Creating a Path
Introduction
A Path is essentially a “course” or “track” composed of multiple Rooms in LearnPath’s UGC system. By creating a Path, you can provide learners with a structured roadmap through your content, enable progress tracking, and optionally add a certificate of completion. Below is how to set it up.
1. Preparation & Prerequisites
- Rooms Ready: It’s best to create and publish your Rooms first. A Path is basically an ordered list of Rooms, so if you haven’t, see Creating Room.
- Optional Certificate: If you plan to offer a completion certificate, have a PDF template ready. Make sure to leave space for learner name/date for auto-fill.
2. Navigating to the Path Editor
- Go to UGC Editor → Paths.
- Click +Add Path. This will open the Path creation form.
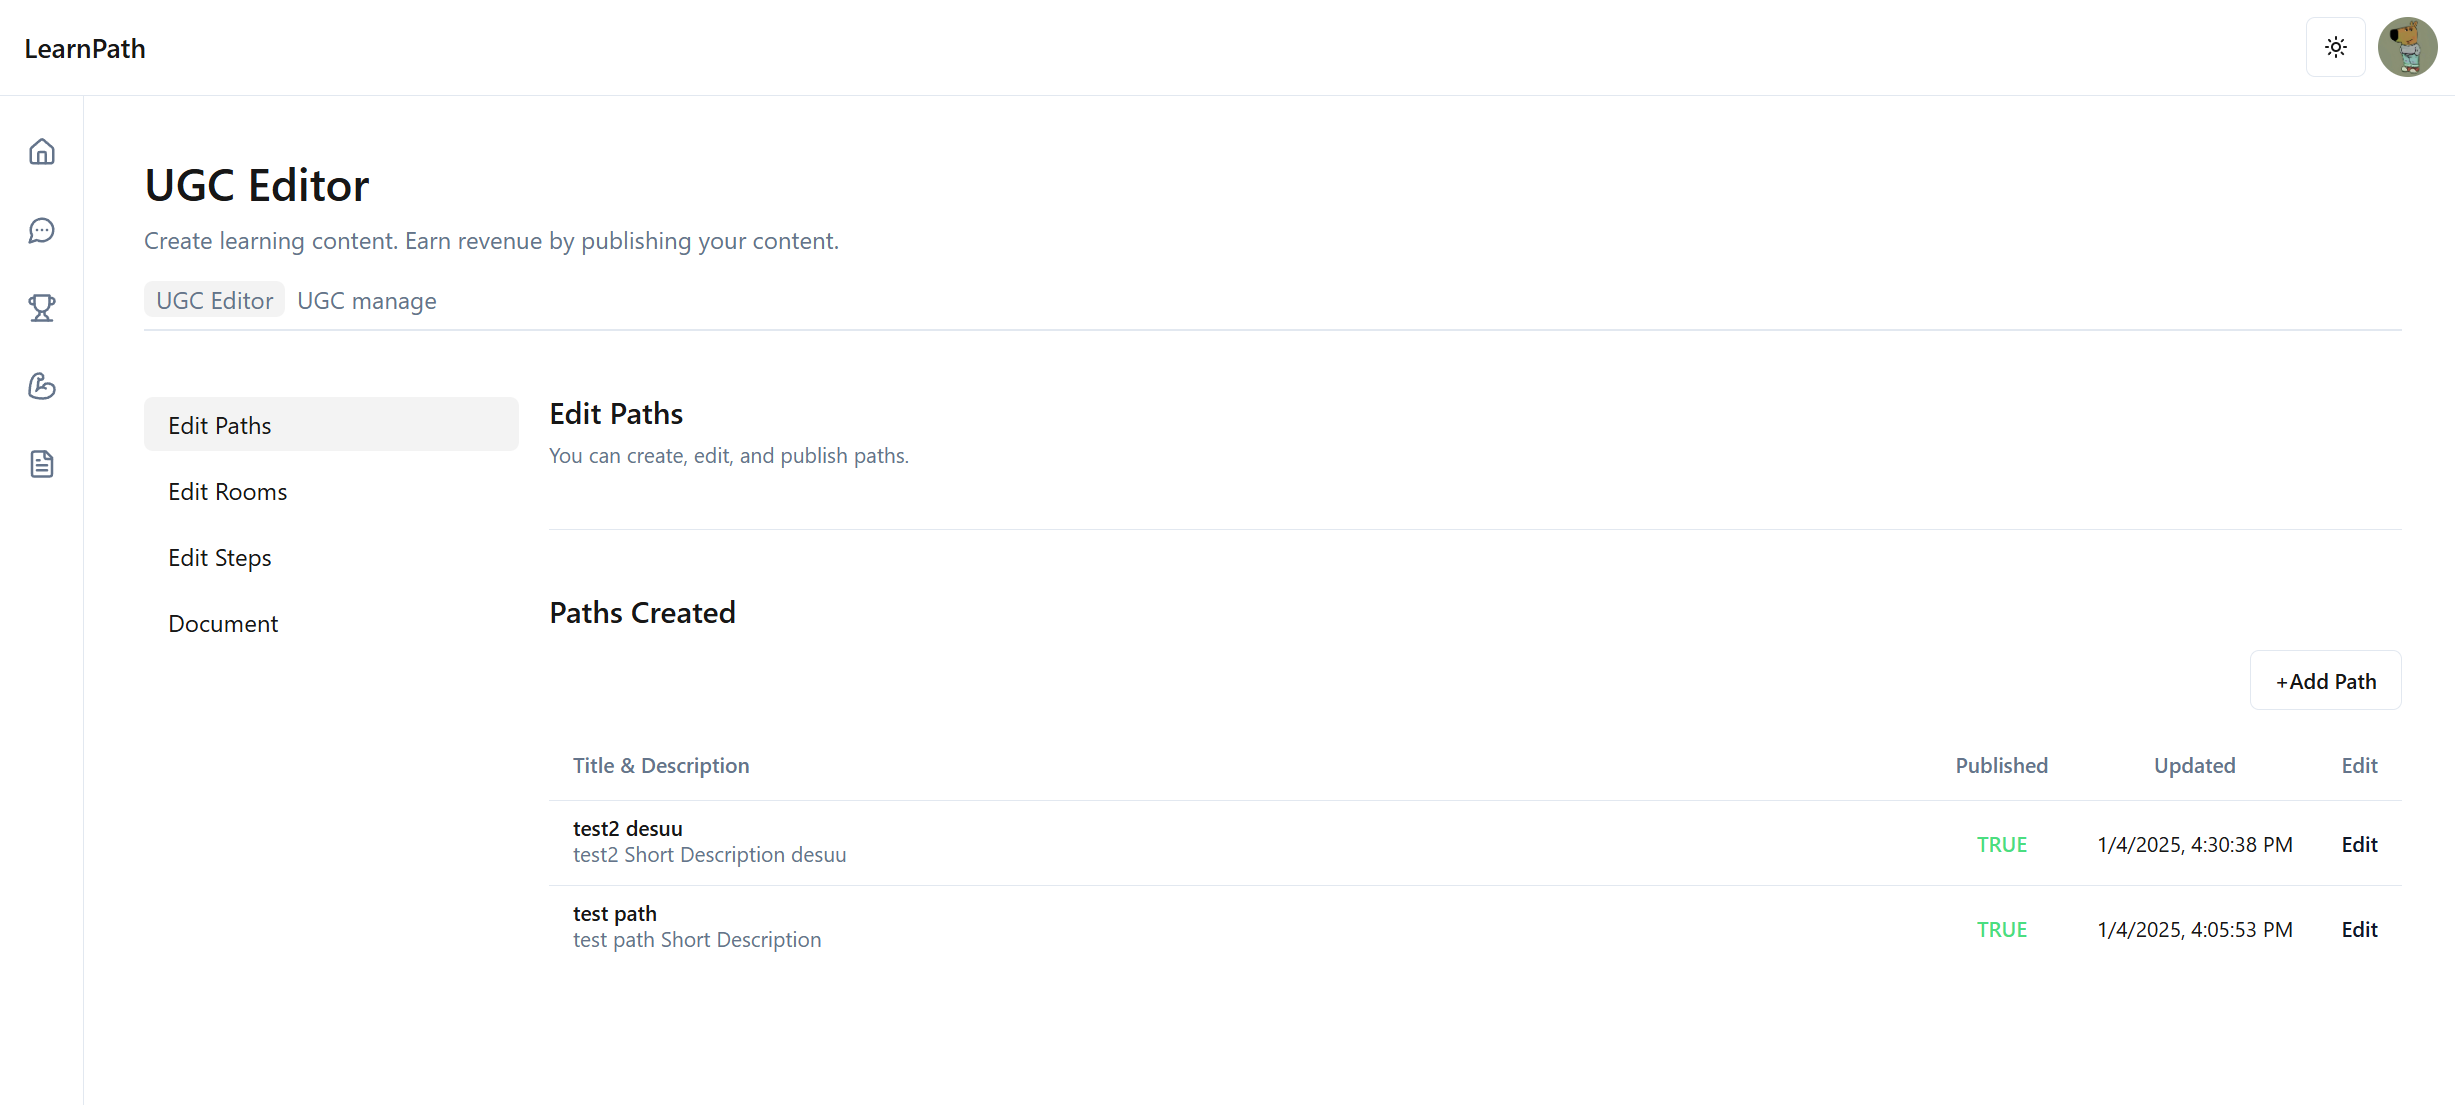
3. Filling Out Path Details
- Title: Give your Path a clear, concise name (e.g., “Full-Stack Web Development”).
- Short Description: A brief overview or tagline for your Path.
- Introduction: A more detailed explanation of what learners will accomplish or learn by completing this Path.
- Path Image (3:1 recommended): You can upload a banner or wide image to visually represent the Path.
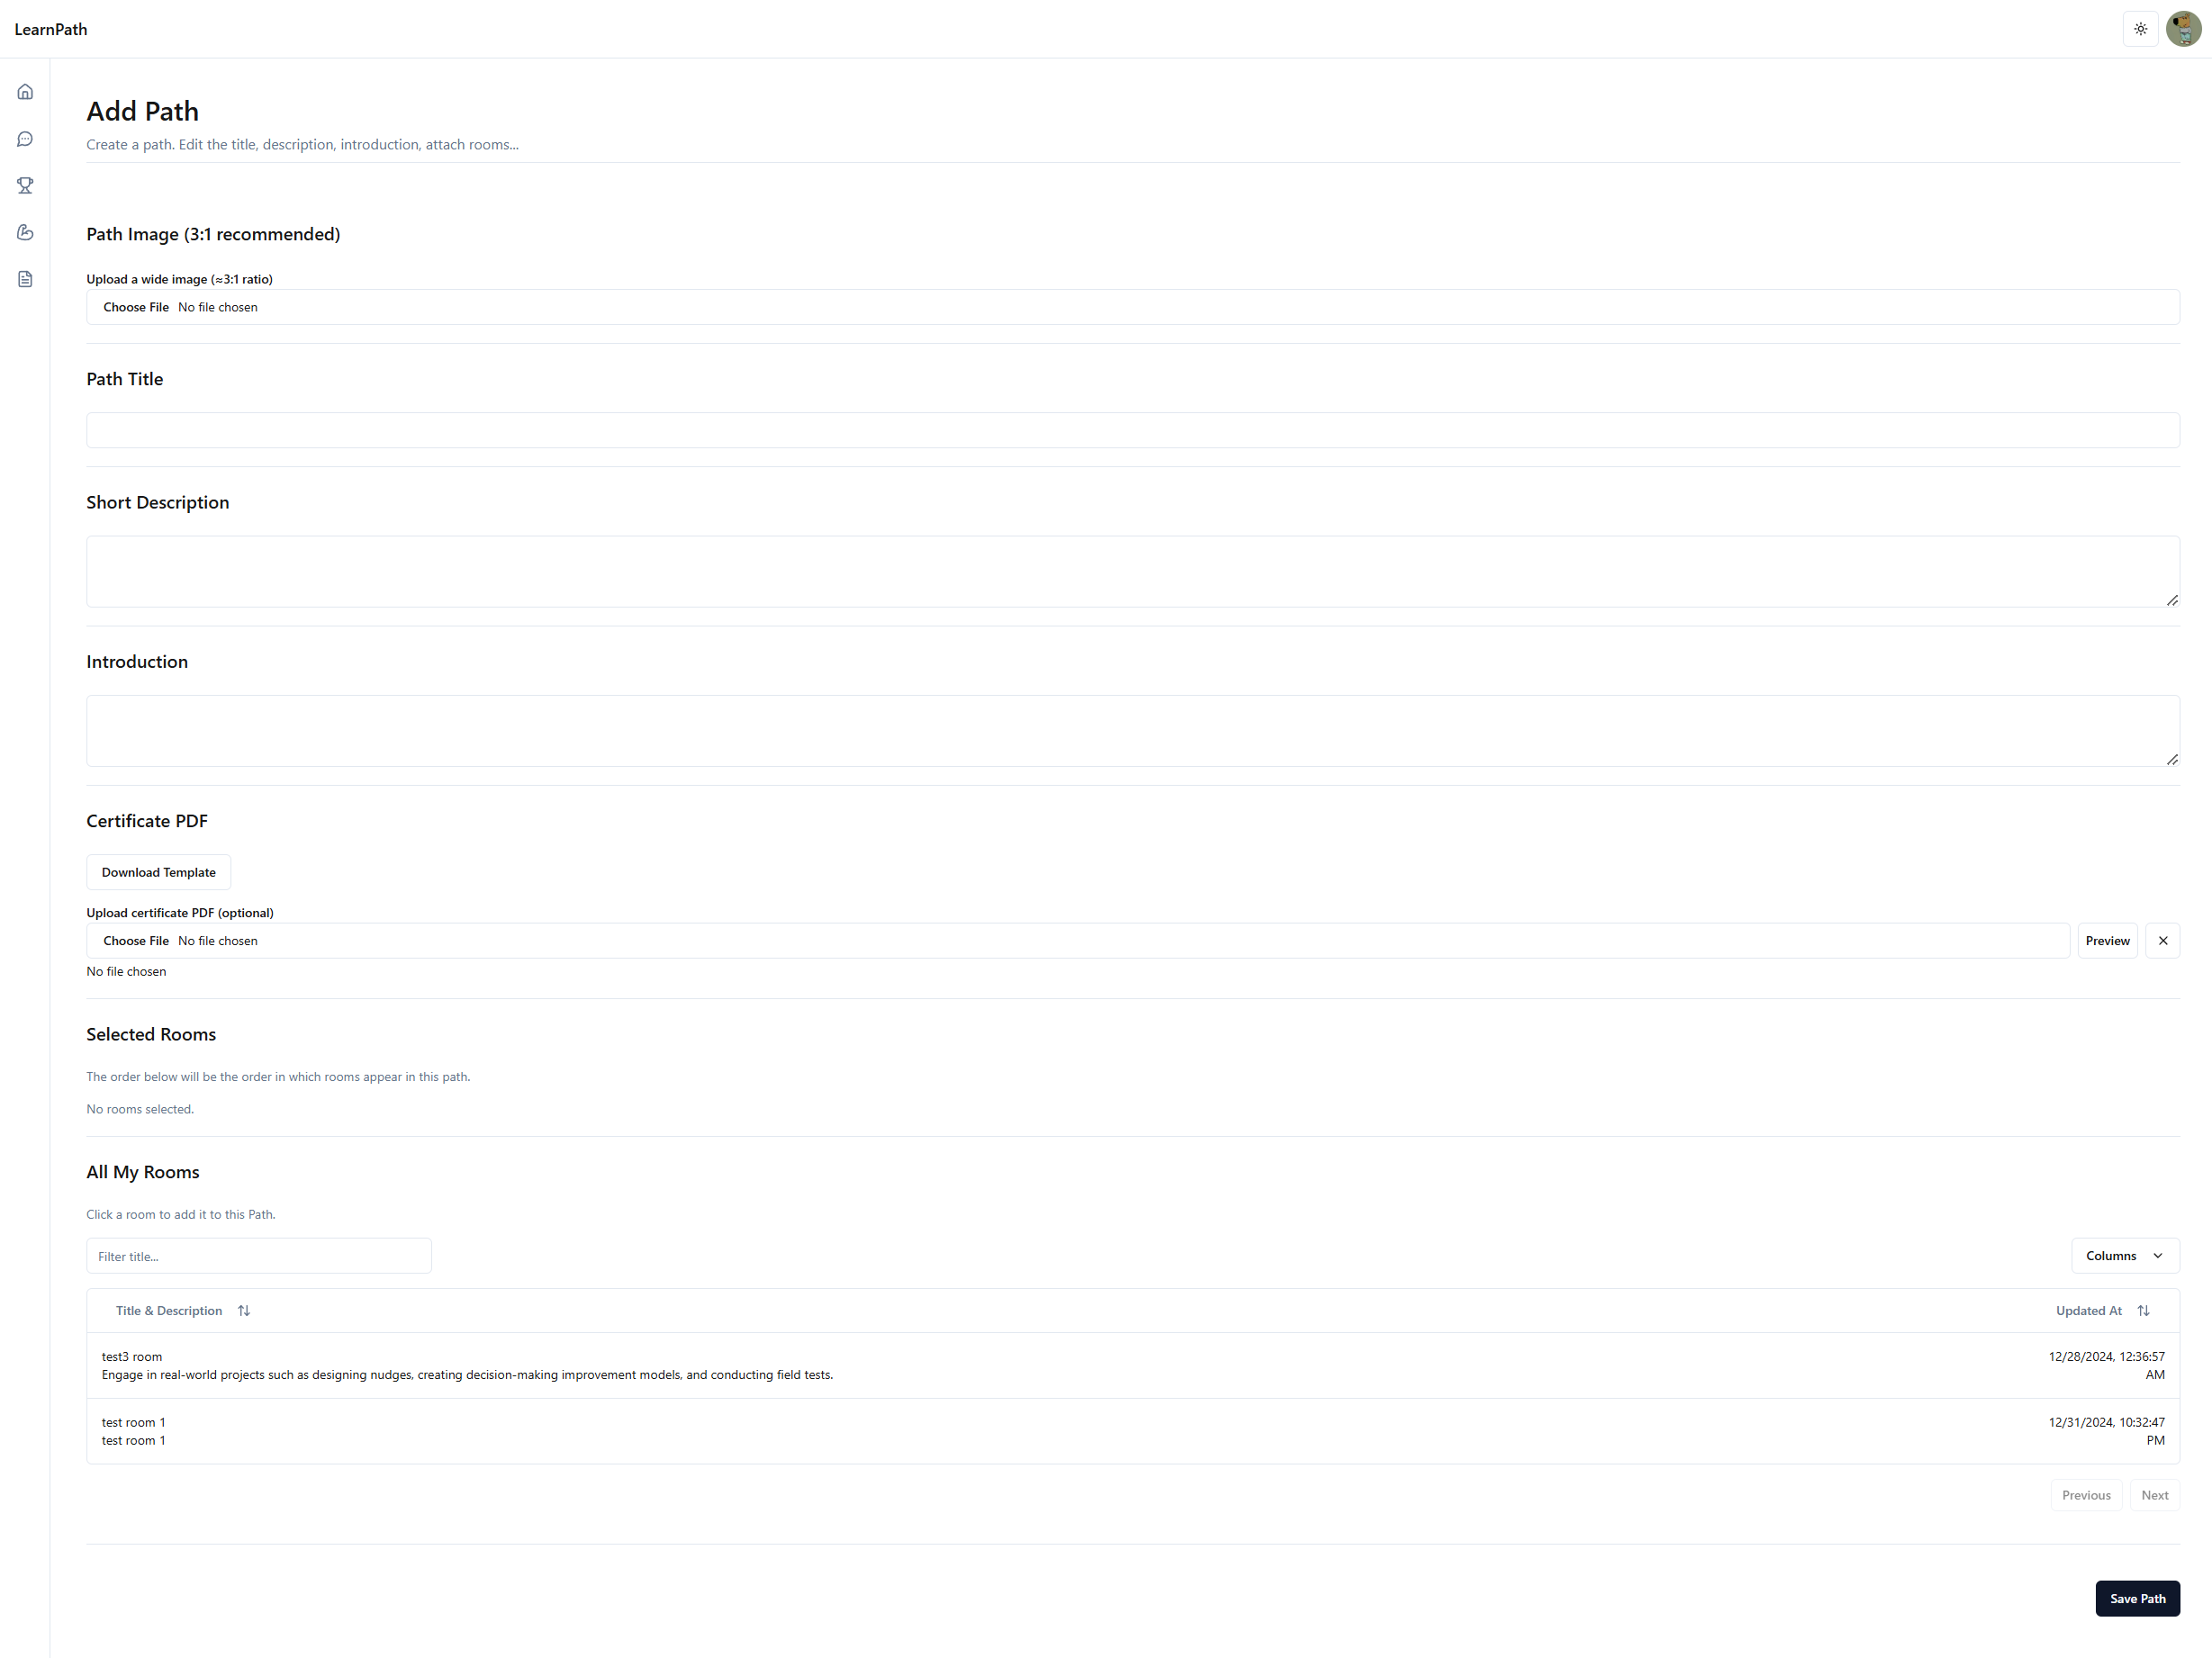
4. (Optional) Certificate PDF Upload
If you want learners to receive a certificate upon completing all Rooms in the Path:
- Download the template (or use your own custom PDF) from the provided link.
- Make sure the PDF has enough space for the learner name, date, and Path title. Keep the format consistent with the system’s placeholders.
- Upload the PDF file (size < 5MB). A preview feature may be available for checking placeholders.
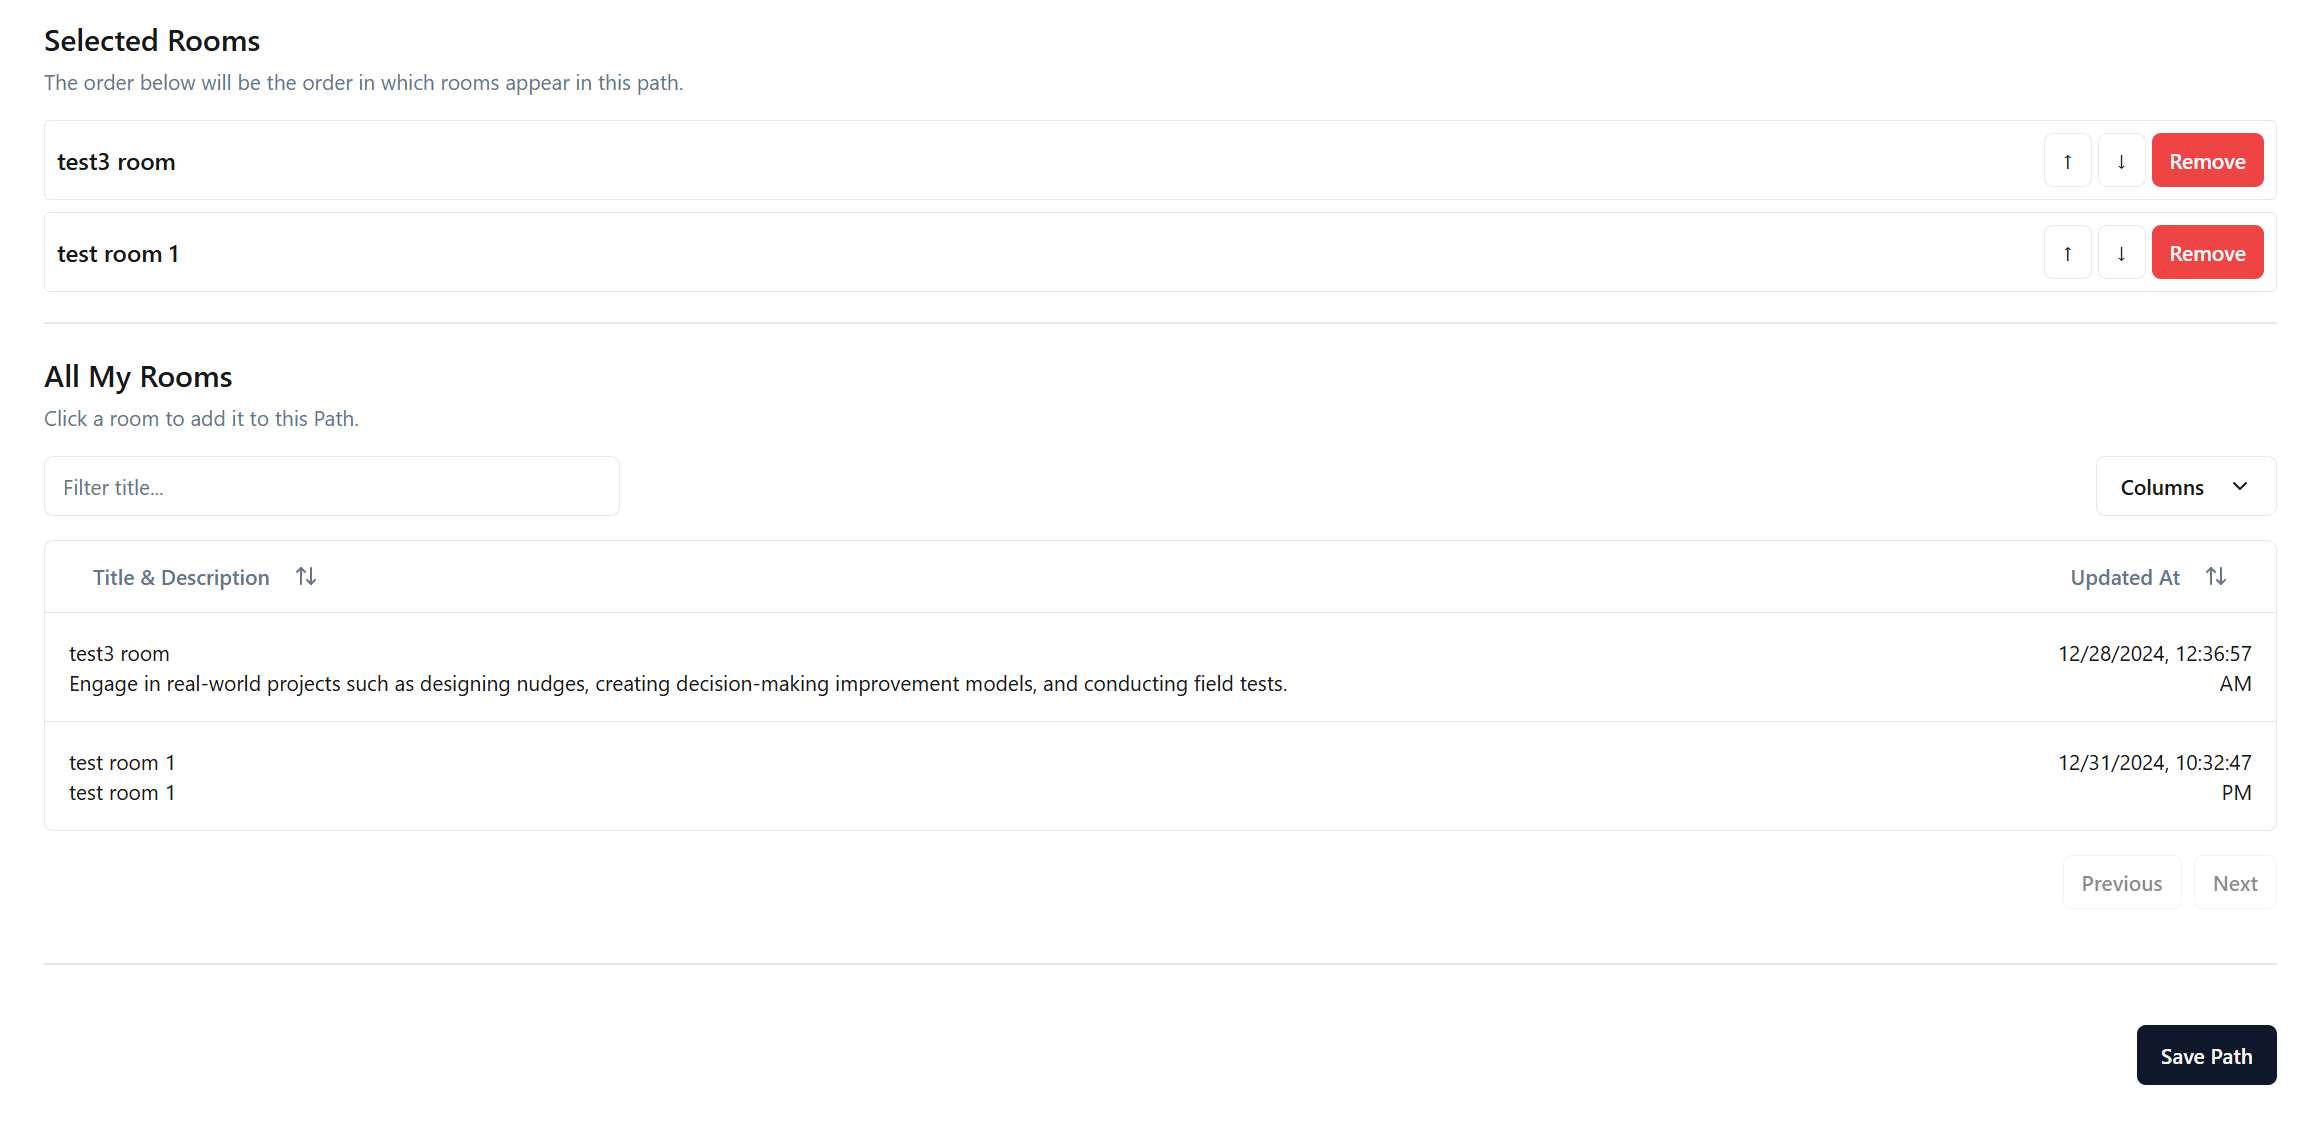
5. Selecting and Ordering Rooms
Below the main form, you’ll see:
- Selected Rooms Section: Initially empty. As you click Rooms from the “All My Rooms” table, they’ll appear here. You can reorder them with up/down buttons or remove them.
- All My Rooms Table: A list of your published Rooms. Click a row to add that Room to your Path. Use the search or sorting features (title, updated_at) if available.
The order you define here is the sequence learners will see the Rooms in your Path.
6. Publish and Save
- Click Save Path to finalize your work.
- You can toggle published in the Path List page to make it publicly accessible. A “TRUE / FALSE” indicator generally shows the publish state.
- Once published, a unique URL is generated (e.g.,
https://learn-path.net/ugc/path/123?ref=external). You can share it on social media or embed it on your site.
7. Next Steps
Learners can now access the Path link. If you included a certificate, the system will check each Room’s progress, and once everything hits 100%, learners can download their certificate. If you want to earn revenue, be sure to share the link with the query parameter to track external referrals.
- FAQ about Path — Explore common questions on organizing courses, editing content, and advanced certificate tips.
- Publish and Monetize — Learn more about generating revenue from your published Path.